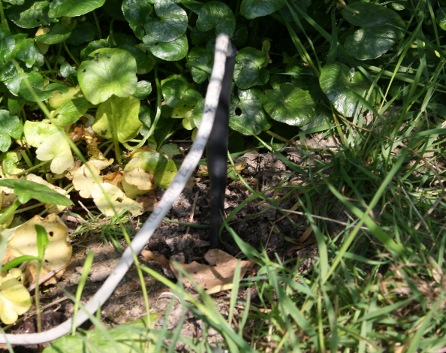
The soil temperature sensor is based on a design from John Bennett . I have made a couple of changes to John's design, firstly I do not have PCB making facilities, second his sensor has to sit at the end of a 1-Wire bus, or off the side as a spur. I thought long and hard about having a spur, but changed my mind quite near the end of the build and have made it fit inline. Firstly it could not sit at the end of the bus, the rain gauge does that, and secondly I was concerned that a spur of this length (apporx 2m) would cause reflections on the network.
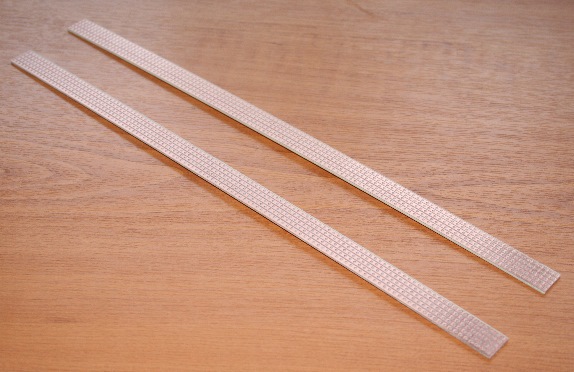
John used a PCB to mount his sensors on to, sad to say I do not have all the required chemicals/tools. Also it seemed a bit of a high cost just to make one sensor. So I came up with the idea of using Vero board, I had a piece hangging around, so decision made.
I cut two strips of the board and glued them together with epoxy glue, this made the board much stiffer and about the right width for the sensors to fit snugly in. The holes are cut so that the two sensors are 2 inches apart, as per John's instructions/guidance.
The cable was then attached and epoxyed to the top of the sensor board. This should help in stopping the wires from fracturing at the top of the board. At this point I tested the it, to make sure the sensors were working as the next part of the procedure, there is no turning back.
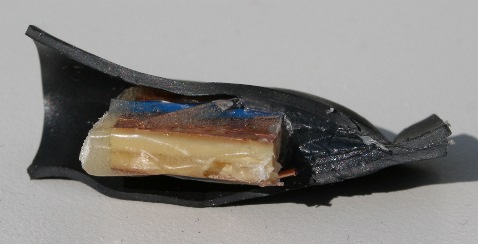
To seal the sensor against the elements I have used a mixture of heat shrink sleaving and hot glue. I initially carried out a test to see how this idea would pan out. As this is very much a one way operation a test was an absolute must. I used a small piece of the board I had created. I then placed it in a piece of heat shrink with at chunk of hot glue in it. I then heated it with a hot air gun until I could see the glue weeping out the end. Then to finally seal it I used a blunt edge and pushed down hard on the open end with the hot glue in it. As you are able to see from the cross section it looks as if it worked well
At the cable end of the sensor, again I used hot glue, but this time I drilled a hole down the centre of the rod of glue for the cable to pass through and put this inside the heat shrink as well. Last of all I took the jump and heated the heat shrink and glue, it worked perfectly, ends sealed and sensor still working. I doubt it would be an easy job to remove the board ever again, and to make one is quite a bit of work, although now I have the procedure worked out.
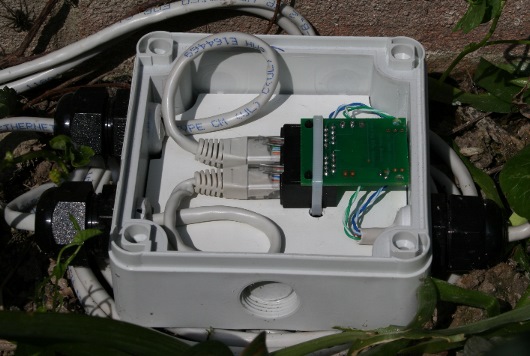
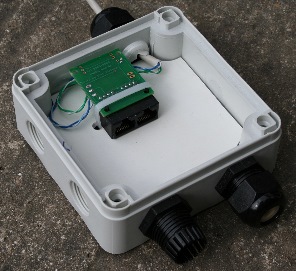
To connect the sensor to the 1-Wire network it required a termination point. This would allow for the sensor to be isolated if there were any issues with it, easily. All that is needed is a RJ45 joiner, so a waterproof box with cable glands was sourced from a local electrical supplier, in my case TLC. A plate was required in the bottom of the box to mount the connections to. One of my friends (Len) cut this out for me, he's retired, got all the time under the Sun, well not really he's never at home, I'm always indebted to the help and inspiration he gives me. On the plate I fixed a hobby-boards temperature sensor board, but with out the temperature sensor, it's really only used as a simple and easy connector block. The board had to have two tracks cut, the data and data ground, as these signals are routed down to and back from the temperature sensors.
That's it complete,, it has taken me around 3 months to complete, just using a little bit of time here and there.