


Over the last few years, when snow has fallen the rain gauge stopped working. It then took a number of days before operation was resumed. When the gauge started working again, the water would be measured at the wrong point in time indicating it's raining(snowing) when it's not.
Following are images without any heaters fitted
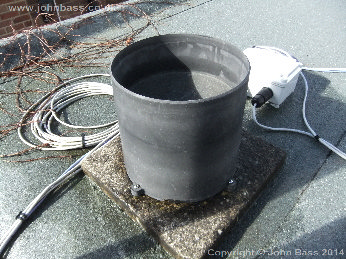 |
 |
A number of people have come up with a number of solutions, including putting a 12v bulb in the rain gauge to heat it, resistive cable that heats, and resistors. Most of the solutions I have reviewed seem to have a major drawback, a lack of accurate control of the temperature of the rain gauge. So after some thought, I have come up with this solution, maybe a tad over the top, but a bit of fun, well for a techie anyhow.
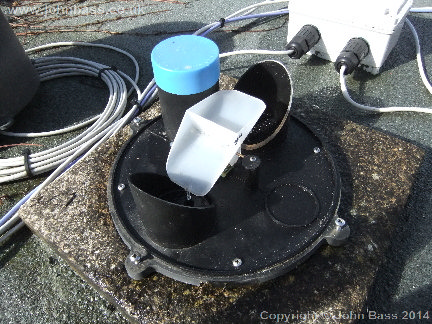
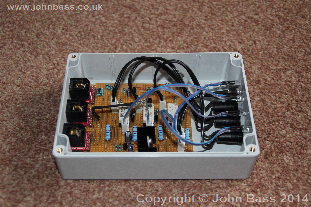
The following images are of the guage with the resistor boards fitted.
 |
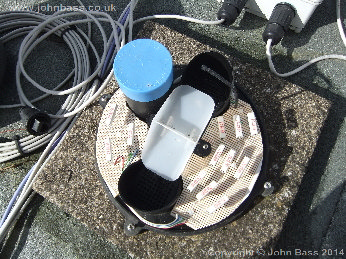 |
As I have started playing around with the Raspberry Pis since they have come out, this seemed an ideal opportunity to put it to the test. To act as the heater controller. The Pi I used is already working as a NTP Stratum 1 server and also running a few other minor projects, so a good bit of reuse.
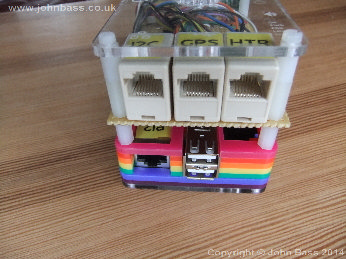
The following images show the Raspberry Pi and the connectors, the HTR is the connection to the Heater Control box
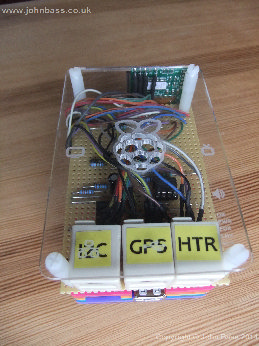 |
 |
So the design... It had to be temperature controlled with respect to the rain gauge. My main concern was heating the gauge up too much and melting it, but enough to melt the snow/ice.
I also wanted to use Cat5 cable, it's cheap and plentiful. The next Issue was, how much wattage would be needed to heat the gauge, well a bit of a finger in the air on this one. I know 12v bulbs seem to work to a degree, so as I know one bulb is not always good enough, thus multiple heaters was going to be needed. This then brought me into thinking how many, back to the Cat5.. I need a pair of conductors for the temperature monitoring (1 Wire bus), leaving me with 3 pairs. Next problem, current, Cat5 is limited to 0.5A per conductor. As there were 3 pairs left in the cable this would indicate 3 * 0.5A or 1.5Amps. Voltage is the next issue, as we need around 12/15 Watts per circuit/pair, 12v is not enough, as 0.5A * 12v = 6Watts * 3 heaters = 18Watts, not enough . After a search of Ebay, I found a couple of PSUs around 32 Volts and 2 Amps, ideal, and cheap :-)
3 sets of 4 * 15ohm 5Watt Ceramic Resistors were used to ‘deliver’ the heat. The three groups are spaced as equally as possible around the gauge.
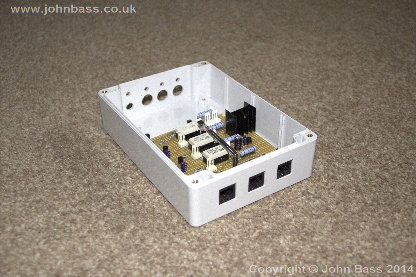
We now have the cable and the PSU sorted, now for the control circuit. As the Raspberry Pi has such a simple input/output system, all that would be need is a simple set of relays to turn on/off the heaters. A separate control module would be needed to energise the relays and monitor for any fuse failure. The other issue is that as the relays are 12v. A 12v regulator would also be in the control enclosure, there would be heat generated from this as well as the LED current limiting resistors, and thus quite a bit of heat would be generated in the control unit. So as there is a temperature sensor in the rain gauge, why not put one in the control module, I Wire is very well suited to this as one can put them in parallel on the same pair of conductors.
 |
 |
The unit does not need to be live all year, in fact only a few days a year. As I did not want the PSU using power all the time I plugged the PSU into a ZWave controlled mains switch, which can be controlled by the heater software and so the PSU can be switched on and off when needed. This also has an advantage that if there is a problem with the heater circuit failing and getting stuck on, the power can be removed automatically/remotely, thus allowing for the shutting down of the whole heater system.
The following page shows graphs of the rain gauge temperature, controller temperature and when the heaters have been turned on. rain gauge heater graphs